How To Fix A Leaking Shower Head
Are you looking for a solution to a leaking shower head that you cannot seem to fix? Let us help you! Follow along as we explain how to stop a leaky shower head.
Has your shower head started leaking all of a sudden? We get how annoying that can be.
Moreover, a leaking shower head wastes water. You know the saying, ‘little drops make an ocean’? That’s exactly what happens when your shower drips.
All that water could be put to good use, but instead, it just washes away. Fortunately, we have the know-how to fix those leaks and make your life easier.
This brief guide addresses this issue. If you are facing a similar problem, we believe you will find this one helpful.
So, let’s not waste any more time and dive right in!
Before we begin, you should know exactly what causes a leaky showerhead. When a shower head leaks, it usually means that the fixture has become loose. Sometimes, it can indicate a problem with the faucet valve, which controls water flow to the shower head.
Either way, you can fix the problem in a DIY way. You can start by examining and repairing the shower head, which we have addressed first. Then, you can move on to the faucet valve if required. In a subsequent section, we learned how to fix a shower tap or replace a shower valve.
First, you must gather all the tools and equipment before you get your hands dirty. So, here is a list of all the necessary items.
Once you have gathered the above-listed items, you can proceed with the job.
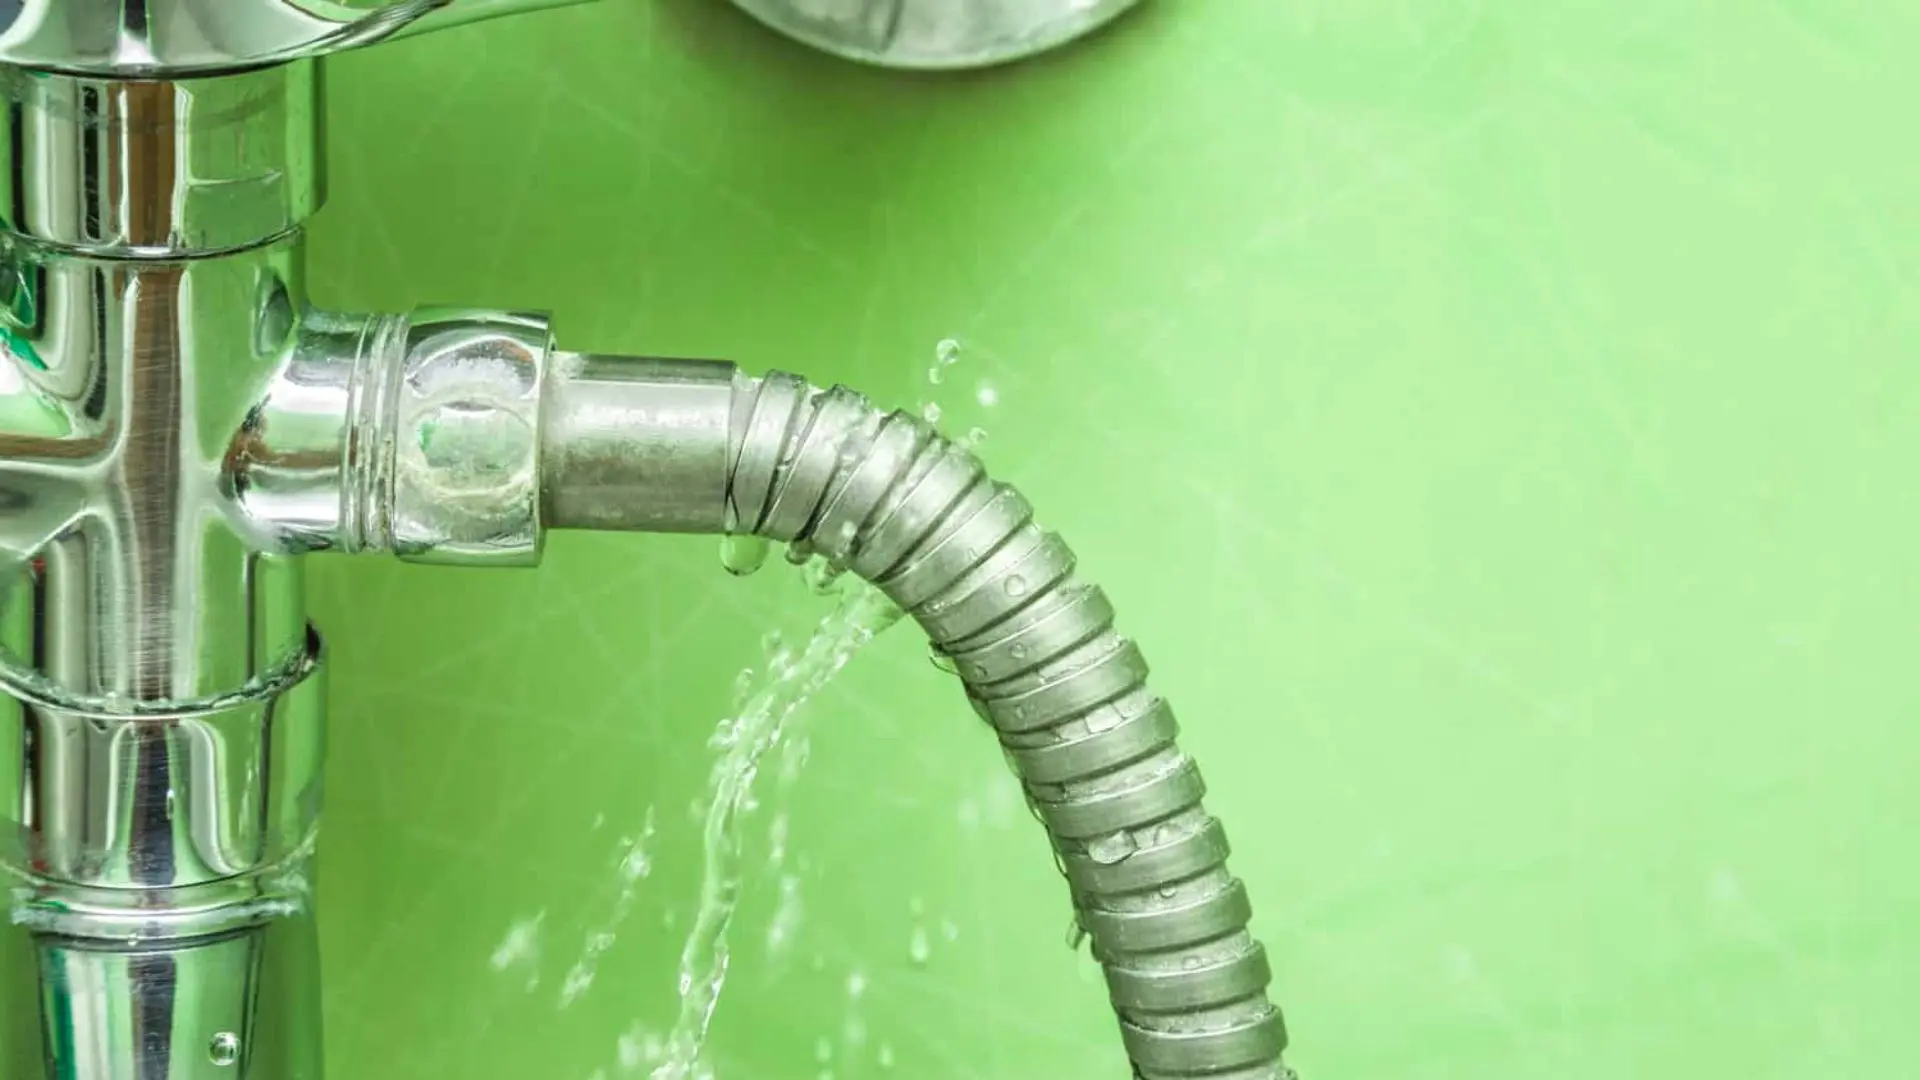
Several things could cause a leak in your shower, especially the shower heads. Depending on where the water is dripping from, the source of the issue can also be determined, making it much easier to fix. Sometimes, the shower head or faucet is dripping even when the water is not in use.
Start by turning off the mains water supply. This prevents any water wastage and ensures you stay dry while working.
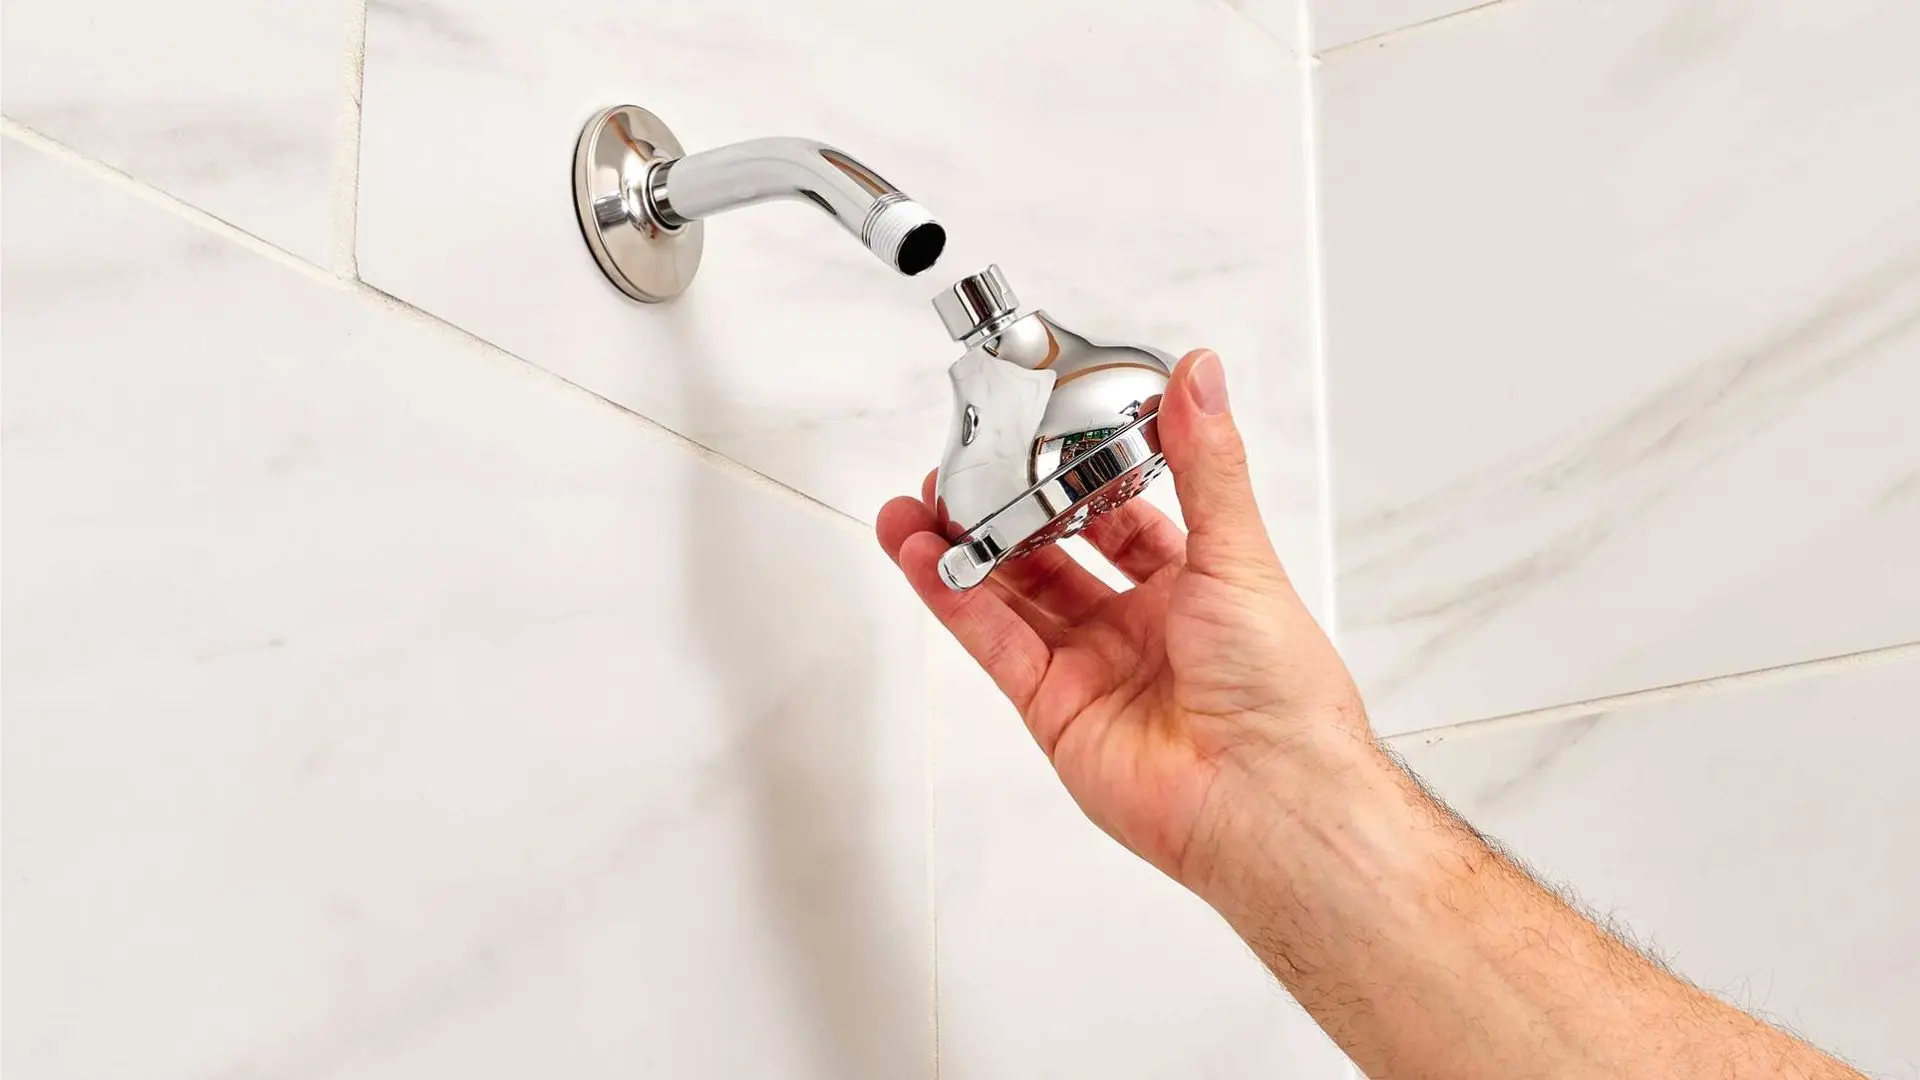
After that, remove the shower head by slowly unscrewing it from the pipes. Typically, it can be done with bare hands, but if the head is stuck tightly, unscrew it with wrenches or pliers.
Keep a towel or a bucket below the leaky showerhead, as there may be water in the pipe even after shutting off the mains. Once you remove the showerhead, that water will spill.
Taking these precautions will help you avoid making a mess.
After the shower head is removed, you need to scrutinize it. A washer will be inside, so you must check if it is intact. If not, you need to replace it with a new one.
It would be best to clean the shower head by dipping it in a vinegar-filled bowl. Let it soak for a few hours, then rinse it with warm water.
While the shower head is soaking in vinegar, you can focus on the screw threads on the shower arm. First, brush off any dirt or grime from the thread. Then, you will need to wrap the threads with Teflon sealing tape.
Be sure to apply two or three loops of the tape. But don’t overdo it, or you will have difficulty with the next step.
After cleaning the shower head and wrapping the tapes, it is time to reattach the shower head. Gently screw the shower head back on the shower arm. Keep turning it until it becomes tight. However, avoid tightening it too much; otherwise, it may break the head. Then, turn on the water mains, and your shower will return to business!
If your shower still leaks after fixing the shower head, it indicates that the faucet is at fault. In that case, you can fix the faucet using the process described below.
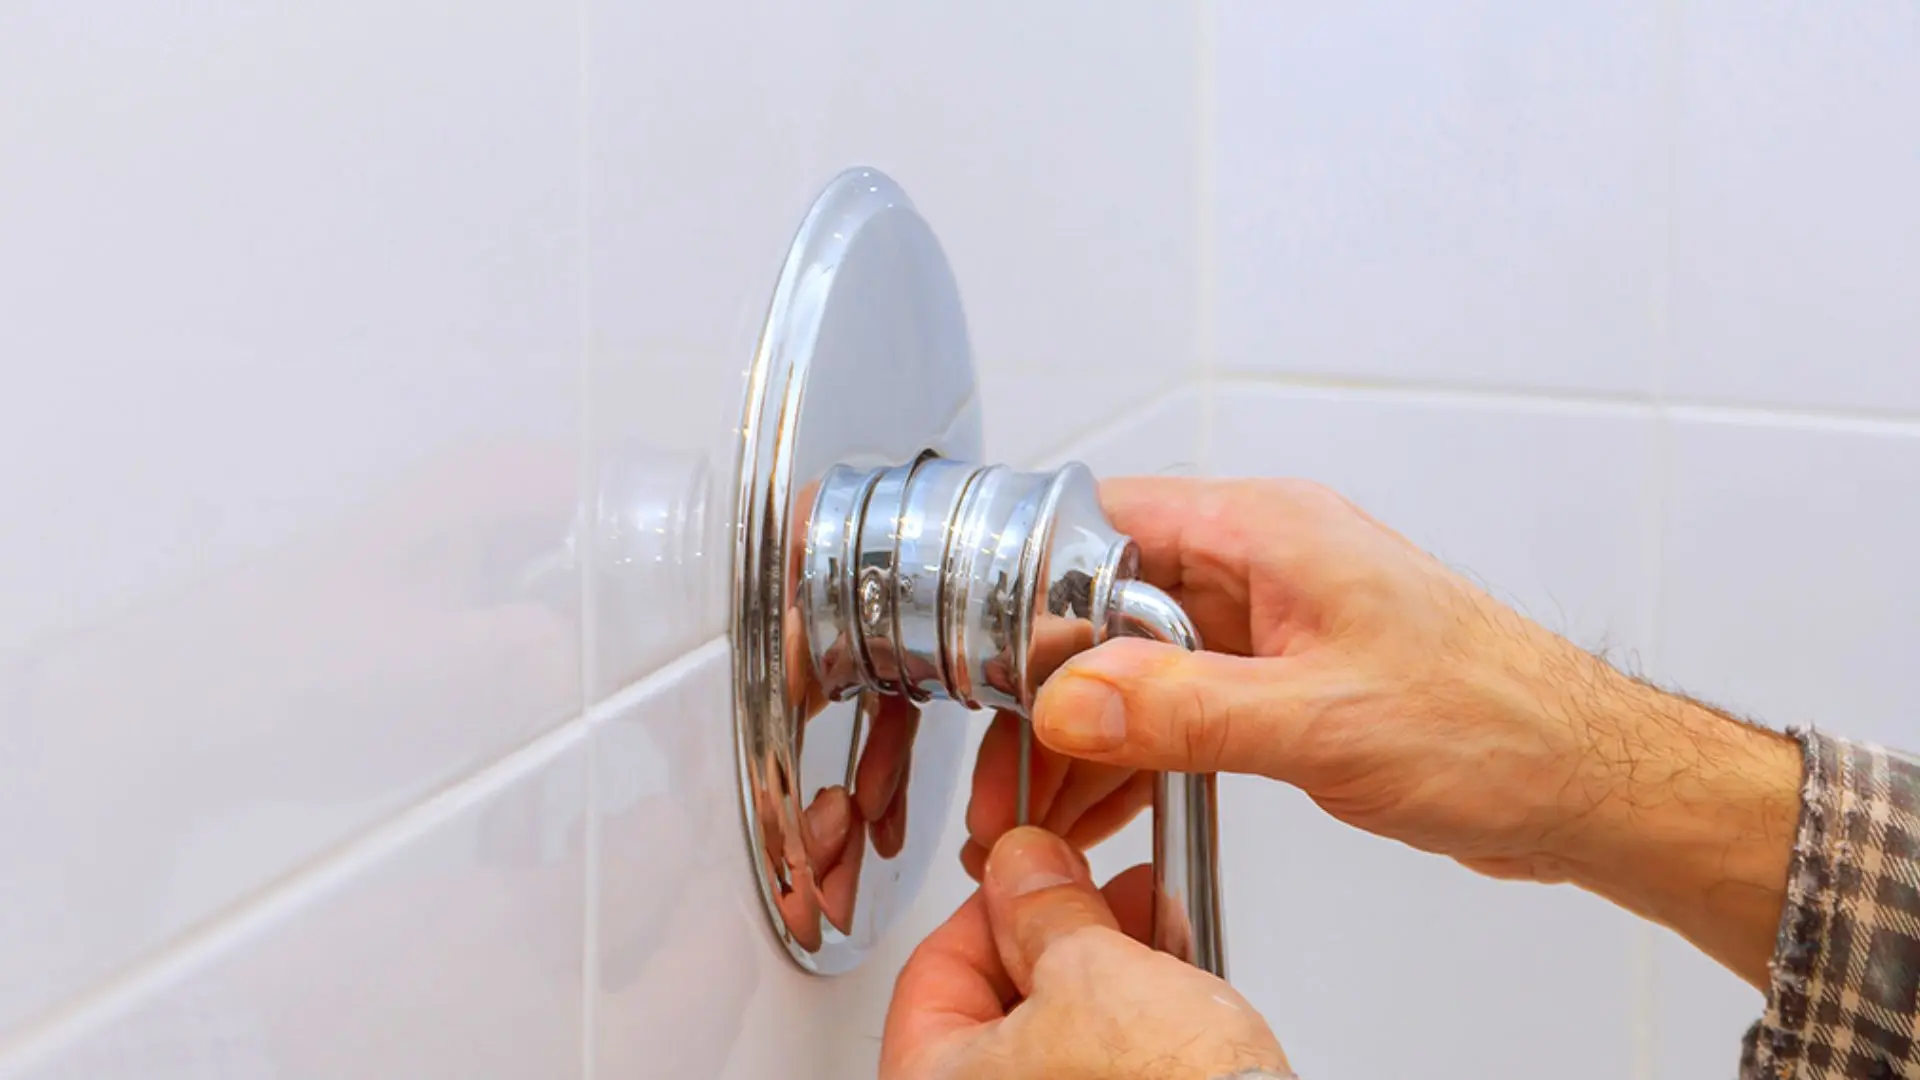
As before, you must turn off the mains water supply and remove the shower handle. Carefully remove any screws from the faucet handle using a screwdriver. Once that’s done, you must remove the plate covering the faucet valve. Remove the nuts holding the plate, and carefully pry it open with a utility knife or screwdriver.
After exposing the faucet valve, give it a thorough inspection. If there’s any damage, swap out the faulty washers for fresh ones. Use caulk to seal any minor cracks or ruptures.
If the damage is too extensive, you must replace the entire faucet valve. To do that, loosen the valve joints with a wrench. Then, remove the old valve and replace it with a new one. Subsequently, tighten the valve joints to ensure there’s no leakage.
Reattach the covering plate and faucet handle by tightening the screws. Again, do not tighten them too much, or they might break. Then turn the mains back on, and you are done!
Once you’ve finally solved your leaky showerhead problem, you’ll want to prevent it from happening again. Here are some valuable tips for keeping your shower head drip-free long-term:
Following these prevention tips and acting quickly when you notice drips can go a long way toward protecting shower head leaks. No one wants to deal with this annoying issue repeatedly!
That’s how you can stop a shower head from leaking. After going through the process, it seems pretty simple.
So, grab your gear and get started with the repair! If you follow the instructions we have provided here, you can fix your entire shower head or faucet body in no time.
On that note, we would like to give you one final piece of advice before we go. You should always check the fittings once you are done to ensure no more problems. In the long run, it will save you a lot of trouble. If the problem still exists, immediately call a professional to handle the issue for you. The Melbourne plumbers at WP Plumbing can assist you with your leaking shower head, so be sure to contact us!
That said, it’s time for us to go now. Farewell, everyone!
Has your shower head seen better days? Then you need to follow our guide to learn how to clean your shower head DIY at home with a few simple (an natural) ingredients.
Have you noticed a leak coming from your gutter? Whether it is due to a blockage or wear and tear, find out how to fix it before it causes costly damage!
Want to be prepared to handle a leakage in your hot water system? You’re at the right place, as we’ve compiled this detailed guide on everything you need to know!


