New Toilet? Perfect Flush Guide
Unsure how to adjust the water level in your new toilet? Our easy-to-follow guide will help you achieve a perfect flush, ensuring optimal performance from your new commode.
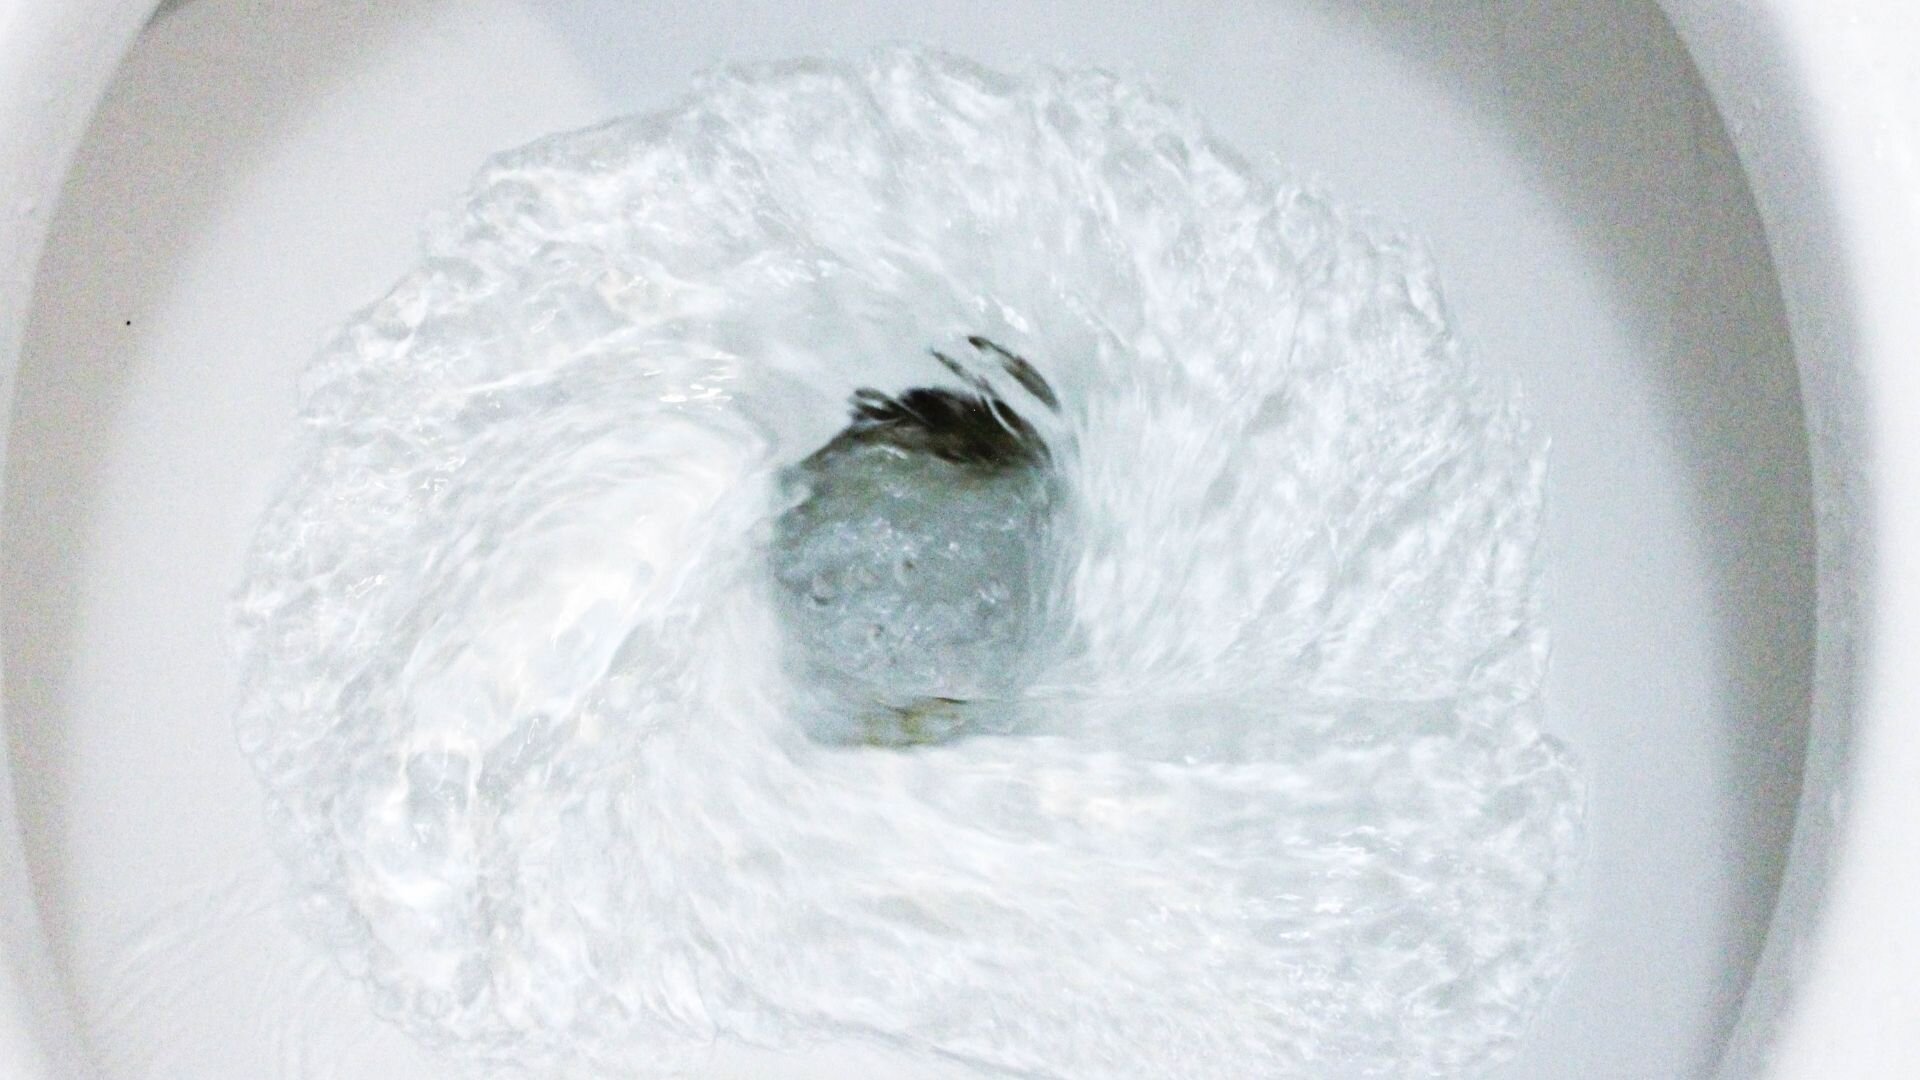
The water level in your toilet tank really matters when it comes to efficient flushing. If it’s too low, there’s not enough power to push waste through the pan into the waste pipe. On the other hand, having too much can waste water without boosting performance.
Many modern toilets, like wall suites, have adjustable fill valves to make fine-tuning easier. It’s crucial to set the water level to the manufacturer’s mark, often found inside the tank. This helps your toilet run smoothly while saving water.
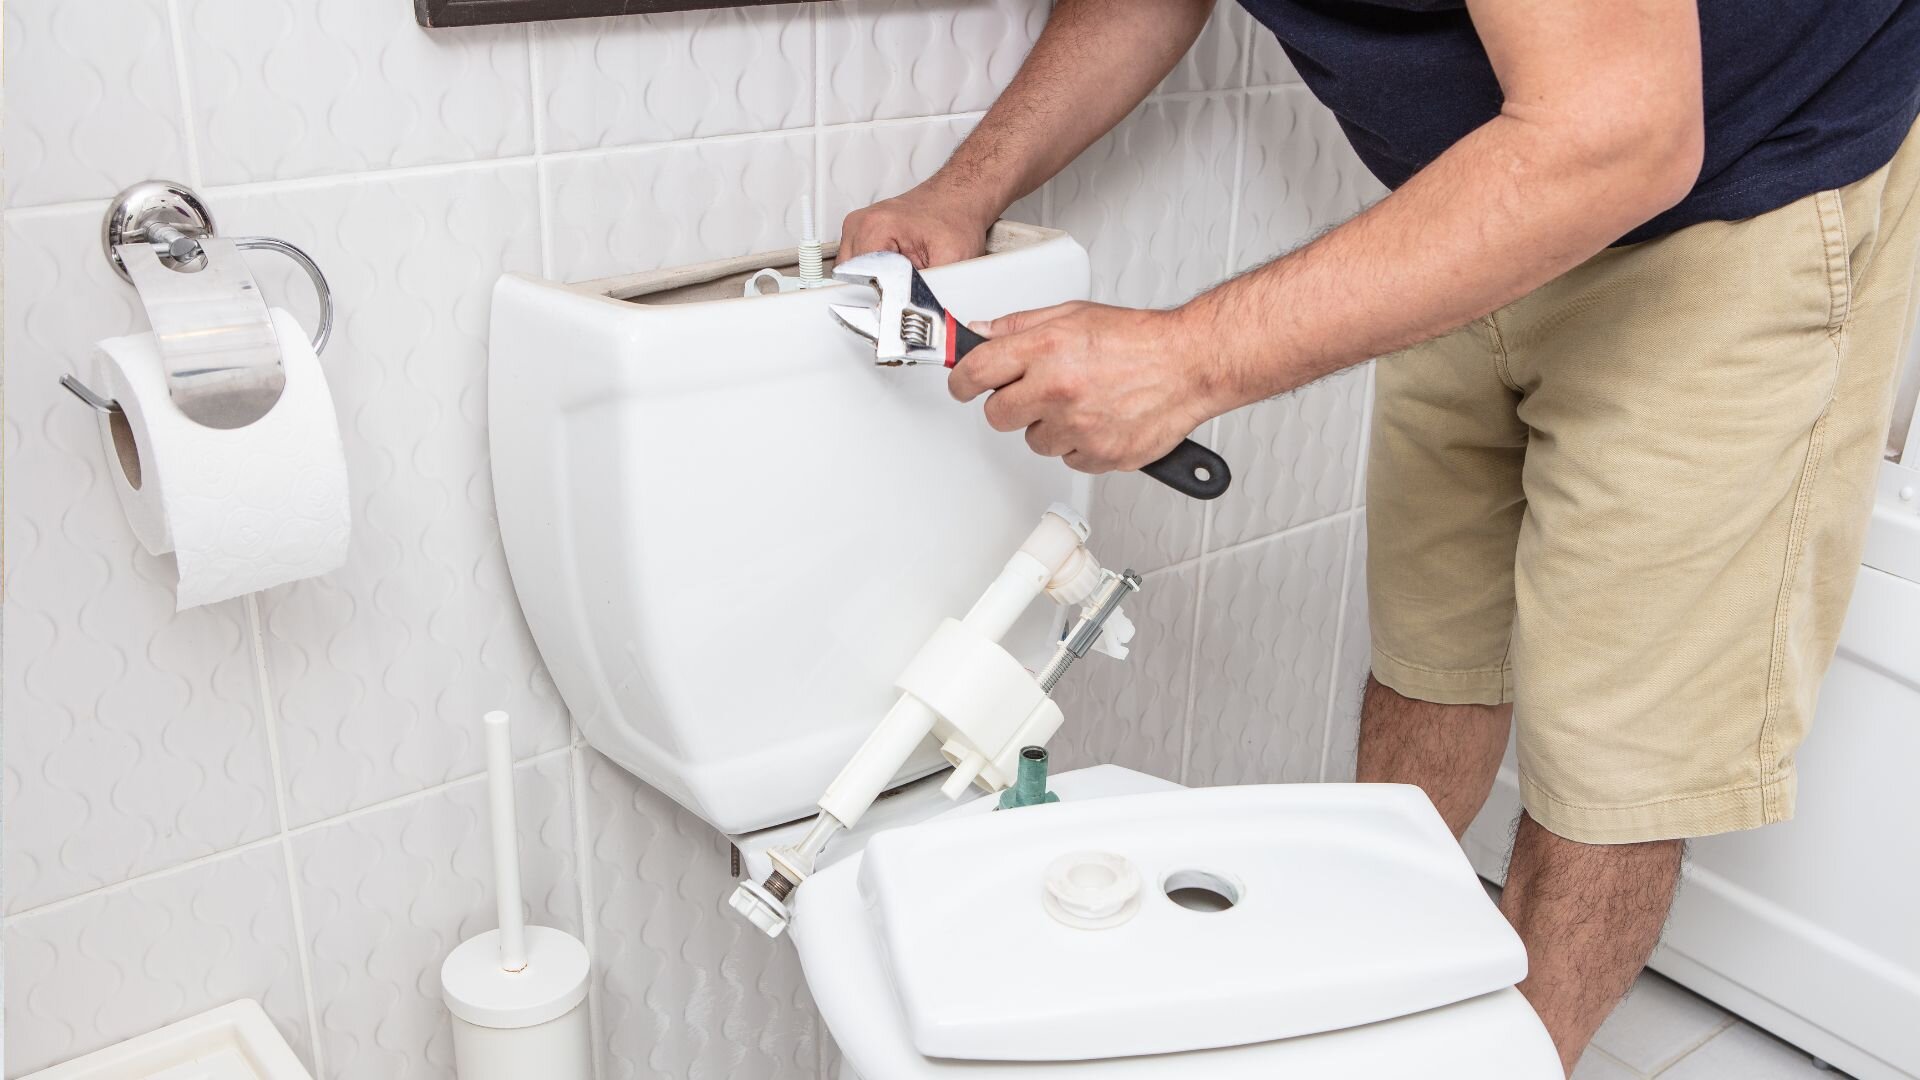
Take a look at both the fill and flush valves to make sure they’re working properly. Adjusting the fill valve—whether it’s a float cup or Fluidmaster—can help keep the water at the right level, ensuring good performance and reliability.
It’s crucial to have the right water level in your toilet to ensure efficient flushing and to avoid overflows. Here’s how you can spot and fix common water level problems.
Before diving into repairs, take a simple test. After a full flush, observe the water level in the bowl. Ideally, it should reach about halfway up the rim.
For most fixes, you’ll only need a few basic tools that are usually found in most homes:
Float Cup Valve:
Fluidmaster Valve:
Access the Valve:
Locate the Adjustment Screw:
Adjust the Water Level:
Test and Refine:
Access the Valve:
Locate the Adjustment Arm:
Adjust the Water Level:
Test and Refine:

Some toilet parts adjust easily, but modern flush valves are usually set up for the best performance at a fixed level. So, fiddling with the flush valve itself might not be the answer.
Let’s focus on common culprits that can hinder a strong flush:
Blockages within the flush valve can restrict water flow, leading to weak flushes. Check for debris lodged around the rim or in the flush valve opening. To clear minor clogs, you can try a toilet plunger or a hooked wire (be gentle to avoid damaging parts).
Leaks around the flush valve can also steal water pressure, resulting in a less forceful flush. If you notice leaks at the base of the valve or around the connecting parts, it’s best to call a plumber. Addressing significant leaks promptly can save water and prevent further damage.
For long-term water efficiency, be proactive! Regularly check your fill valve for wear and tear. A worn valve can lead to overflows or wasted water. Fix any minor leaks promptly – even a drip can add up over time. These simple steps can save water and money in the long run.
After the excitement of installing your new toilet wears off, you might notice the water level in the tank isn’t quite right. A water level that’s too low can lead to weak flushes, while an overflowing tank wastes water and can damage your bathroom floor. Thankfully, adjusting the water level is a relatively simple DIY task.
You can achieve that perfect water level by identifying the type of float system in your toilet (ball-and-arm or float cup) and following a few easy steps with a screwdriver. Remember, a well-adjusted toilet saves water and ensures optimal performance. For flawless toilet installation or assistance with any plumbing needs, contact the trusted professionals at WP Plumbing. We’re here to help!
From wall-hung and close-coupled to back-to-wall options, each toilet type offers unique advantages in style, space efficiency, and plumbing compatibility. This guide walks you through key considerations to help you choose the perfect toilet for your home’s layout and lifestyle.
Is your toilet suddenly overflowing on your bathroom floor? Quick, read our emergency guide for DIY tips to unblock your toilet before the problem gets worse!
Poor water pressure in older homes often points to ageing pipes. From clearing build-up to pipe relining, learn practical methods to restore water flow and improve your plumbing system’s performance—without replacing everything.


