Showers make up almost 24% of the average household water use, making them one of the easiest places to start reducing your water use. Yet, nothing’s more annoying than turning off the tap and hearing the persistent sound of a dripping shower head. Not only is it frustrating, but it could also be quietly racking up your water bill and even damaging your bathroom walls. This blog dives into why your shower head keeps dripping, what it might mean for your plumbing, and how to sort it out before it becomes a serious issue.
Is It Normal for a Shower Head to Drip After Use?
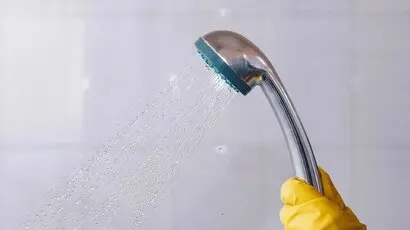
It’s completely normal for your shower head to drip for a few seconds after turning off the faucet handle. This is usually just leftover water flow from the shower hose, shower arm, or shower wall releasing due to gravity or a bit of water pressure. But when that dripping carries on for minutes or even hours, that’s not just gravity—it’s a problem.
A shower head dripping nonstop can signal issues like a faulty shower valve, loose connections, or tiny cracks in your fittings. If your shower head leaking more consistent, it could be a sign of internal problems with the diverter valve or shower cartridge. It’s not just a harmless drip—constant moisture can slowly cause water damage and affect your cold water supply and hot water balance. Spotting these signs early helps avoid costlier issues down the line.
Common Causes of a Dripping Shower Head
There’s no single culprit when it comes to a leaky shower head, but there are a few usual suspects.
![]()
1. Worn-out washers and O-rings
Rubber washers and O-rings form seals within the shower valve and faucet to control water flow. Over time, these small parts wear out, causing leaks. If your shower head’s leaking worsens when the tap is off, these parts could be failing.
2. Build-up of limescale or sediment
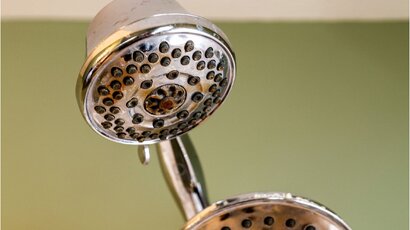
Australian water can contain minerals that cause buildup inside your showerhead. This leads to blockages that redirect water, creating uneven water flow and drips. Cleaning with white vinegar and an old toothbrush can help clear it out.
3. Faulty or loose valves
A dodgy shower cartridge or diverter valve can fail to fully shut off your water supply, causing ongoing drips. You might also have loose connections around the shower arm, valves, or faucet.
4. Poor plumbing or ageing fixtures
Old shower setups may have tiny cracks in pipes or worn-out seals behind the shower wall. Over time, these hidden issues turn into visible leaks. Even the best DIY fix won’t last long if the base system is shot.
5. Incorrect installation
Improper sealing, wrong teflon tape use, or poor alignment of the shower hose or valves can lead to slow leaks. These may require a full reinstallation.
The Hidden Costs of Ignoring a Dripping Shower
Letting a leaky shower faucet drip away might seem harmless, but over time, the damage adds up.
1. Water wastage
A dripping showerhead can waste thousands of litres per year. That’s not great for the environment—or your wallet. Melbourne households can lose hundreds annually from leaks alone.
2. Higher water bills
Even a slow shower head leak can increase your water bill noticeably. In cities like Sydney or Melbourne, where water isn’t cheap, ignoring the issue can cost you.
3. Mould and moisture
Constant moisture inside bathroom walls promotes mould growth, warping, and water damage. It’s unsightly, unhealthy, and expensive to remove.
4. Small leaks turn into big repairs
A minor leaky faucet today could mean replacing pipes or tearing out tiles tomorrow. Fixing it early saves money and headaches.
Can You Fix a Leaking Shower Head Yourself?
Absolutely—if you’re handy, there are plenty of easy fixes to try before calling in a professional plumber.
![]()
1. Clean your showerhead
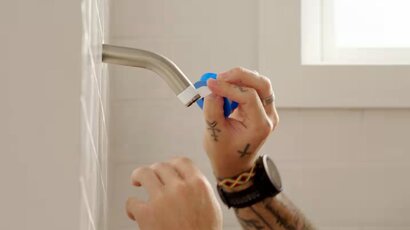
Soak the showerhead in white vinegar overnight. Use an old toothbrush to scrub away build-up and mineral deposits. Rinse and reinstall.
2. Replace worn washers or O-rings
Turn off the water shutoff valves and dismantle the faucet. Swap out the rubber washer or O-rings from your local hardware store. It’s a simple job with a deep socket wrench.
3. Tighten loose fittings
Check for loose connections around the shower arm or valves. Apply fresh Teflon tape and tighten them up to stop sneaky leaks.
If these don’t solve the problem, your shower head dripping may be linked to a broken shower cartridge or internal valves—time to bring in the pros.
When to Call a Plumber
Sometimes, a DIY approach won’t cut it—and you’ll need a licensed plumber to properly fix a leaking shower.
1. Dripping persists despite easy fixes
If you’ve cleaned, replaced, and tightened everything you can and your leaky showerhead still drips, the issue is deeper.
2. Signs of internal plumbing damage
Wet spots on walls, inconsistent water pressure, or visible water leaks suggest hidden damage behind the shower wall.
3. Damaged components
If your shower cartridge, diverter valve, or shower valve is corroded or cracked, a professional plumber has the tools and know-how to fix or replace it correctly.
4. Ensuring long-lasting results
A licensed plumber can guarantee a watertight seal, adjust the water supply, and inspect your full system for peace of mind.
How to Prevent Future Drips
Preventing water leaks is easier than fixing them. A few simple steps can save you from dealing with a leaky shower head again.
1. Routine inspections
Regularly check your shower arm, shower hose, and faucet for any signs of leaks or loose connections.
2. Proper installations
Use quality parts from your local hardware store, apply Teflon tape, and ensure everything is aligned correctly during any reno or replacement.
3. Monitor water pressure
Too much water pressure can strain seals. Have a licensed plumber test your pressure annually.
4. Schedule professional maintenance
Get a yearly plumbing check-up to inspect valves, fittings, and any hidden issues inside your shower wall.
What Happens During a Professional Shower Head Repair?
If your shower head keeps dripping, here’s what you can expect when a licensed plumber steps in.
1. Detailed inspection
They’ll examine your shower valve, shower cartridge, faucet handle, and internal pipes using specialised tools.
2. Identify the source
The issue might lie in the shower wall, a cracked diverter valve, or worn O-rings. They’ll locate the exact problem.
3. Fix or replace components
Using tools like a deep socket wrench, they’ll replace the cartridge, washers, or other internal parts. Everything is sealed properly.
4. Test and seal
Once repaired, your plumber will test water flow, re-seal all joints with Teflon tape, and ensure there’s no more dripping from the shower.
![]()
Leaky Shower Head? Let’s Get That Fixed for Good
A leaky shower head might seem small, but it can lead to a mountain of trouble, water wastage, rising bills, and serious water damage to your bathroom. Acting quickly means you avoid stress, save money, and protect your home.
At WP Plumbing, we fix everything from a leaky showerhead to an entire shower valve replacement. Our licensed plumbers handle every job with care and precision. So whether it’s a shower act problem, a worn-out rubber washer, or a new shower head you need, we’ve got you covered.
Don’t wait for drips to turn into disasters— give us a call today.


