Are you sick of staring at that lifeless, outdated kitchen sink? A shiny new sink paired with a sleek faucet can instantly transform your kitchen and elevate the entire countertop’s look. The good news? Installing a kitchen sink is no longer the daunting task it once was—thanks to modern fittings. You can now skip the torches and soldering.
When installing a new sink, it’s not just about screwing and gluing. Pay attention to the finer details, especially when connecting the sink drain to the waste line and tailpiece—that’s often the trickiest part.
To ensure a good fit, measure the tailpiece and waste line diameters before you hit the hardware store for parts. Keep reading to discover the simple steps and tips for installing a kitchen sink that looks like a pro did it!
How To Install A Kitchen Sink
Step 1: Measure The Sink Bowl Layout
Start by marking the back edge of your counter to centre the sink. Got a sink template? Great—trace the perimeter while ensuring it’s parallel to the counter’s back edge, with a 1.5-inch gap. No template? No worries! Just grab a two-inch-long piece of tape and outline the sink opening instead.
If your old sink is similar to the new one, you can use its perimeter as a template for marking the spot. That saves you a bit of hassle!
Next, place the new or existing sink upside down on the cabinet within the space between the back and front edge and align it with the previous markings. Make sure it is parallel to the backsplash and the back edge and has at least one and a half inches of space between them.
After tracing around the sink, connect all the markings using a straightedge ruler to form the layout.
Step 2: Prep The Cut Lines
You’ll find that you’re left with a rectangular-shaped layout on the countertop. This preliminary cutting line must be prepped further before being cut into it. Simply round off the sharp edges by hand and try to alter the measurement as little as possible.
Then, get a spade bit with at least a ½-inch bit and drill holes inside the radius at every corner of the layout. Check again to see if the holes are safe from the sink wall and back edge.
![]()
Step 3: Cut The Sink Opening
Using a jigsaw blade or tile cutter, cut through the front countertop hole and saw along to the back hole following the layout. Repeat on each side.
Next, grab a piece of wood longer than your cut-out and screw it on to protect the tiles from jigsaw damage. Cut along the back and front lines to remove the extra tiles. Check the hole’s measurement afterward and trim the edges if needed.
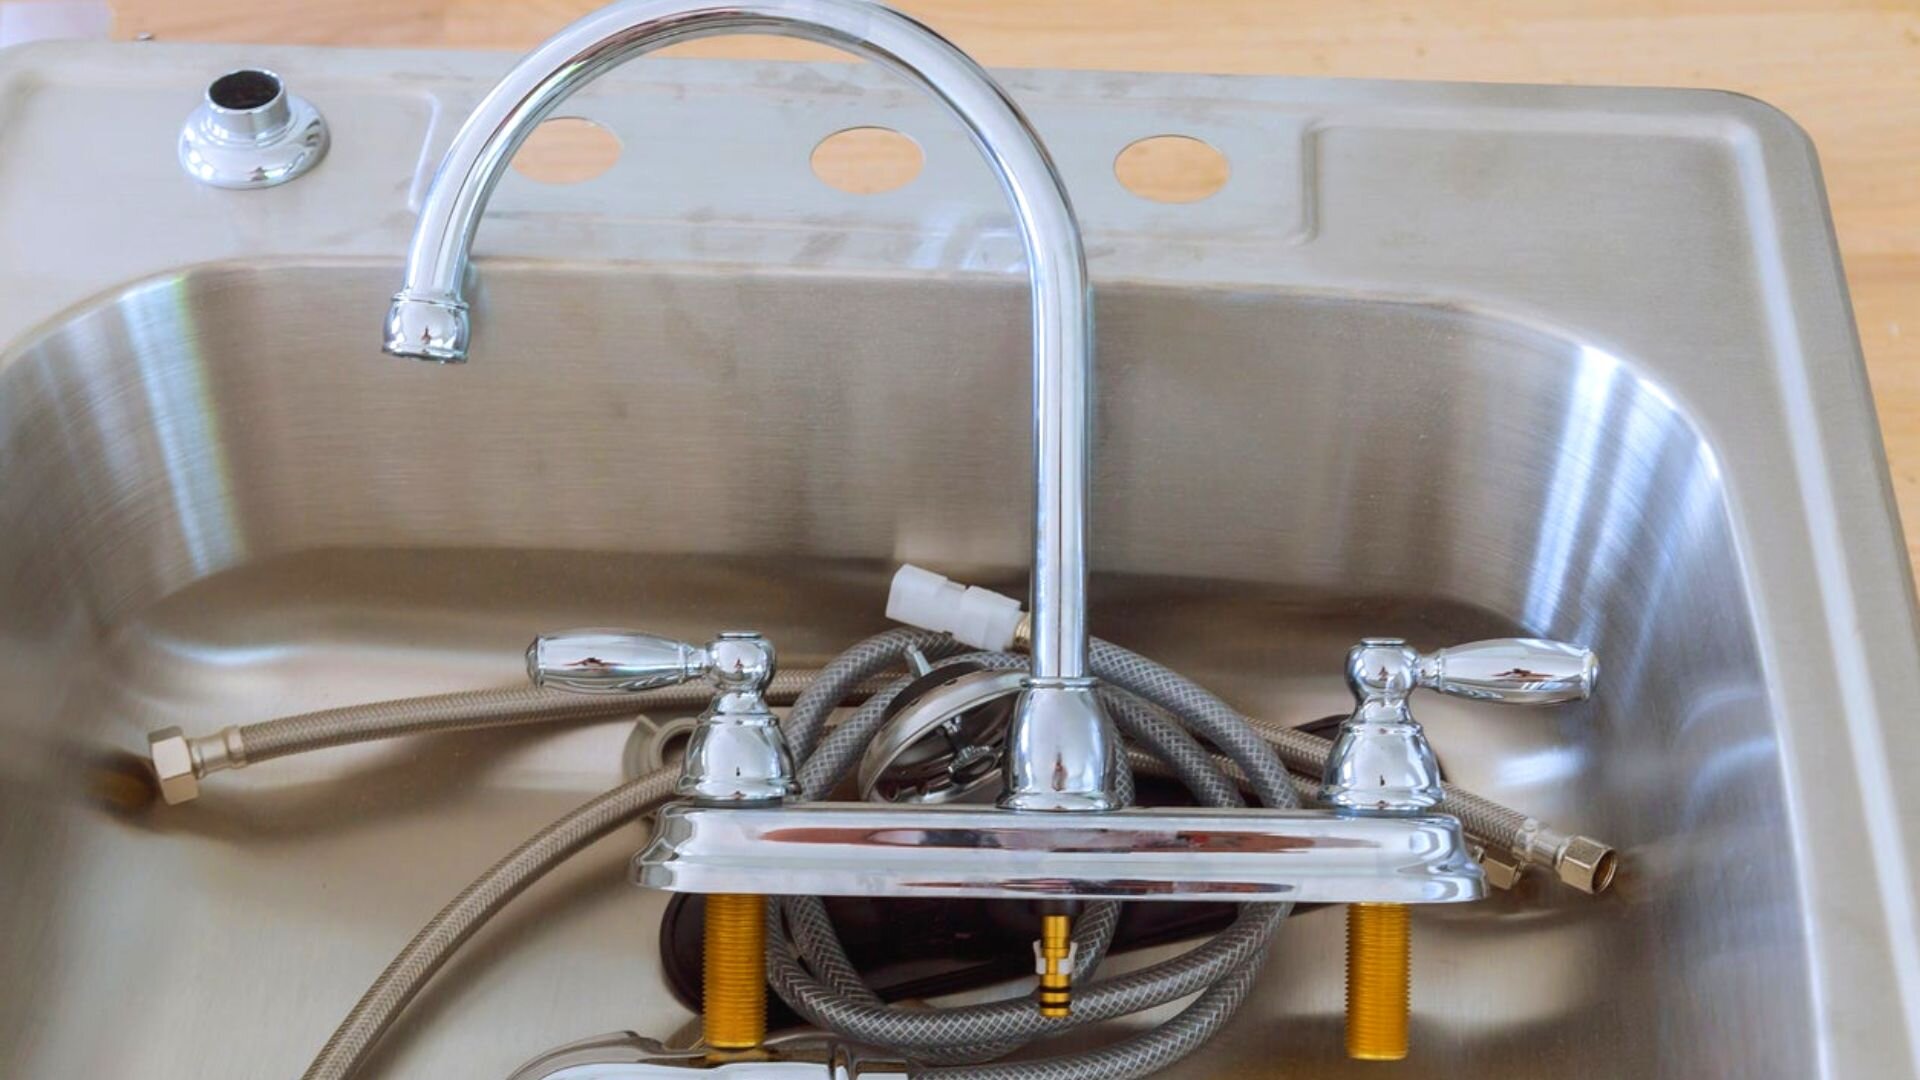
Step 4: Kitchen Faucet Installation
Flip the kitchen sink upside down on the counter. Thread the water supply lines and tailpiece through the gasket to seal the faucet to the sink. Once that’s done, install it through the drain hole.
When done, screw the mounting or slip nuts and washer to the underside of the sink. Test the faucet lines to check if they can move in an entire arc before tightening the nuts.
Step 5: Attach The Drain Strainer
Flip the sink upside down and whip up a thick mix of plumber’s putty. Apply a putty knife generously to the edge of the strainer. Once that’s done, pop the strainer into the drain hole (putty side up, of course), and don’t forget to scrape away any extra putty with a utility knife for a neat finish.
Proceed to attach the washer and rubber gaskets to the strainer and underside of the sink. If any exposed threads are present, dab some pipe-joint compound for a tight connection. Then, attach the locknut to the strainer and use pliers to tighten it and keep it in place.
When the strainer is locked into the sink bowl, fit the gasket into the tailpiece and attach it to the strainer by tightening the slip nut.
![]()
Step 6: Install Sink And Connect The Water Lines
Remove the tape from the layout and squeeze some silicone caulk on the underside of the new sink. Then, lift the sink and set it into the countertop opening. Remove the excess caulk and adjust the sink until it’s parallel to the countertop’s edge.
In this step, it is important to connect the shutoff valves to the faucet tailpiece using supply tubes or a simple hose.
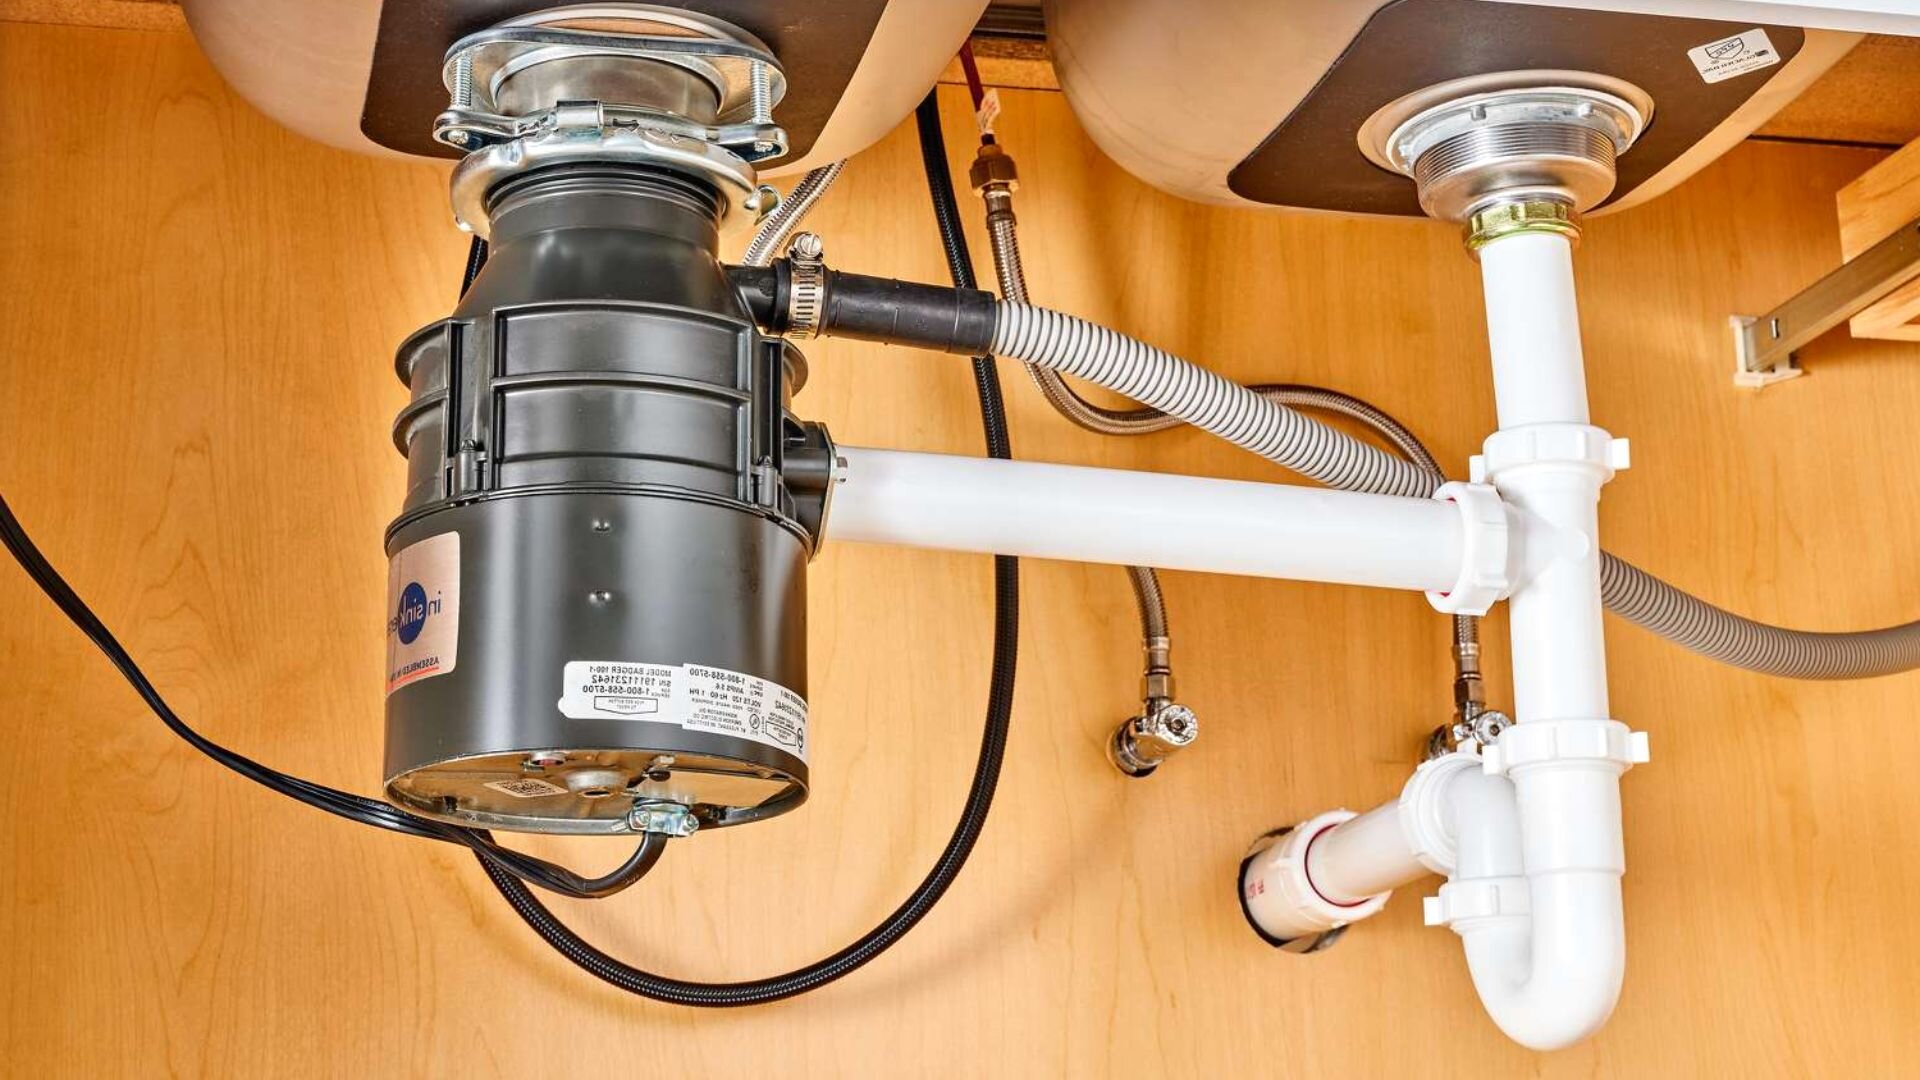
Step 7: Attach Drain Lines
Cut a few pieces of PVC to attach the trap adapter, drain line, or drain pipe below to the p-trap and waste pipe. Slide the PVC cut-outs on the tailpiece for the correct measurement; trim where necessary.
Then, coat the front and other ends of the piece with PVC primer, followed by the PVC cement, and immediately connect the pieces. Maintain the pressure for 30 seconds and let it dry.
Once everything’s dry, reassemble and reconnect all the pieces. Make sure everything’s snug and secure!
![]()
Step 8: Tidy Up
Connect the dishwasher drain to the sink’s tailpiece and secure it with a hose clamp. Just grab a screwdriver to tighten it up. Once you’re done, clear away any grime or leftover putty. Crank up the faucet to full pressure and double-check for leaks. Finally, clean the area to keep everything neat and ready for use.
Installing A Kitchen Sink
And that’s a wrap on our kitchen sink installation guide! If DIY plumbing isn’t your thing or you’re missing the right tools, this job might be tricky—especially when cutting tiles and hooking up water lines. Why not leave it to the pros? At WP Plumbing, our licensed and insured Melbourne technicians are here to help.
With same-day service, upfront pricing, and a lifetime labour guarantee, we’ll install your new sink quickly. Contact us today, and let us handle the heavy lifting!