Ever considered tackling a toilet installation yourself? It might seem daunting, but with a little planning and the right know-how, you can experience the satisfaction of completing a home improvement project and potentially save some money in the process.
For many homeowners, the steep cost of hiring a plumber can be a major push to try DIY toilet installation. Taking on the task yourself not only saves you the plumber’s fee but also gives you the satisfaction of learning a new skill and transforming your bathroom on your own.
However, before diving in, remember that proper preparation is key. Researching the steps involved, gathering the necessary tools, and choosing the right toilet will ensure a smooth and successful installation.
Preparing for the Installation
Assessing the Space
Prior to adding a new toilet suite, take accurate measurements of your bathroom to ensure it fits seamlessly into the existing space. Make sure to double-check the distance from the wall to the centre of the drain opening, or closet flange, to match the new toilet bowl’s specifications.
Ensure the toilet waste pipe and water supply line align with the new toilet’s requirements. Check the location of the water inlet pipe and make any necessary adjustments to the existing plumbing.
Assess the finished floor’s stability, as it must support the weight of the new toilet bowl, tank, and toilet cistern. Also, consider whether the finished wall behind the toilet might need reinforcement.
Verify that the bolt holes in the floor flange match the new toilet’s closet bolts. Finally, ensure there is sufficient space for the toilet seat to be lifted and for comfortable usage.
Gathering the Necessary Permits
Obtaining permits is essential for any DIY plumbing project, including installing a new toilet. Permits ensure that the work complies with local plumbing codes and standards, helping prevent future issues related to improper installation.
Begin gathering the necessary permits by reaching out to your local council or building authority. They’ll inform you about the required documentation and application process. You might need to submit a detailed plan of your plumbing work, outlining locations for the new toilet bowl, toilet pan, and water supply line.
Be prepared to show how the new toilet suite will connect to the existing toilet waste and water inlet pipe. Some councils may require an inspection of the completed work to ensure it meets safety and quality standards.
Having the proper permits not only ensures compliance but also provides peace of mind for your DIY plumbing project.
Essential Tools for DIY Toilet Installation
For a successful DIY installation of a new toilet, you will need several essential tools.
- An adjustable wrench is crucial for tightening the toilet nuts and bolts.
- A screwdriver set is necessary for securing the toilet seat and other components.
- A wax ring and a new wax seal are essential for sealing the toilet base to the drain opening.
- Closet bolts and new toilet bolts secure the toilet bowl to the floor flange.
- A level ensures the toilet bowl is properly aligned on the finished floor.
- A bucket and sponge help clean any remaining water from the old toilet.
- Plumber’s tape and silicone caulk are used to seal connections, including the toilet fill valve and water inlet pipe.
- A hacksaw may be needed to trim bolt holes or floor bolts.
Additionally, tools like a pry bar bucket, putty knife, and locking pliers assist in removing the old wax ring and installing new components, such as the toilet tank and replacement cistern.
Removing the Old Toilet
To remove the old toilet, start by turning off the water supply and draining the toilet. Disconnect the water supply line from the toilet valve inside the toilet tank. Use an adjustable wrench to remove the toilet bolts and floor bolts. Carefully lift the toilet off the flange.
Remove the toilet seat and set it aside. Clean the area around the flange and inspect it for any damage. Remove the old wax ring using a putty knife.
Check that the water inlet pipe located nearby is intact. Ensure the closet bolts holding the toilet in place are removed. Prepare for the new wax ring and new floor bolts.
Installing the New Toilet
Preparing the Flange
Start your new toilet installation by ensuring the flange is both clean and level. Use a putty knife to scrape away any debris or remains from the old wax ring, ensuring a smooth surface.
Inspect the flange for any cracks or damage; it must be in good condition to secure the new toilet properly. Place new closet bolts into the flange, ensuring they are aligned and upright. These bolts will later secure the toilet base to the finished floor.
Make sure the closet bolts are of the same shape and size as the previous ones to fit the bolt holes correctly. With the flange clean and the new closet bolts in place, you can proceed to the next step, confident that your base is stable and ready for the new toilet.
Positioning the Wax Ring
![]()
Before setting the new toilet, position the wax ring on the base of the toilet. Ensure the wax ring is at room temperature for better malleability.
Press the wax ring firmly onto the outlet of the toilet base, ensuring it adheres well and forms a good seal. The wax ring should be of the same shape and size as the old one. This will prevent leaks and create a secure seal between the toilet and the floor flange.
Be careful not to damage or deform the wax ring during installation, as this can compromise the seal and lead to future leaks.
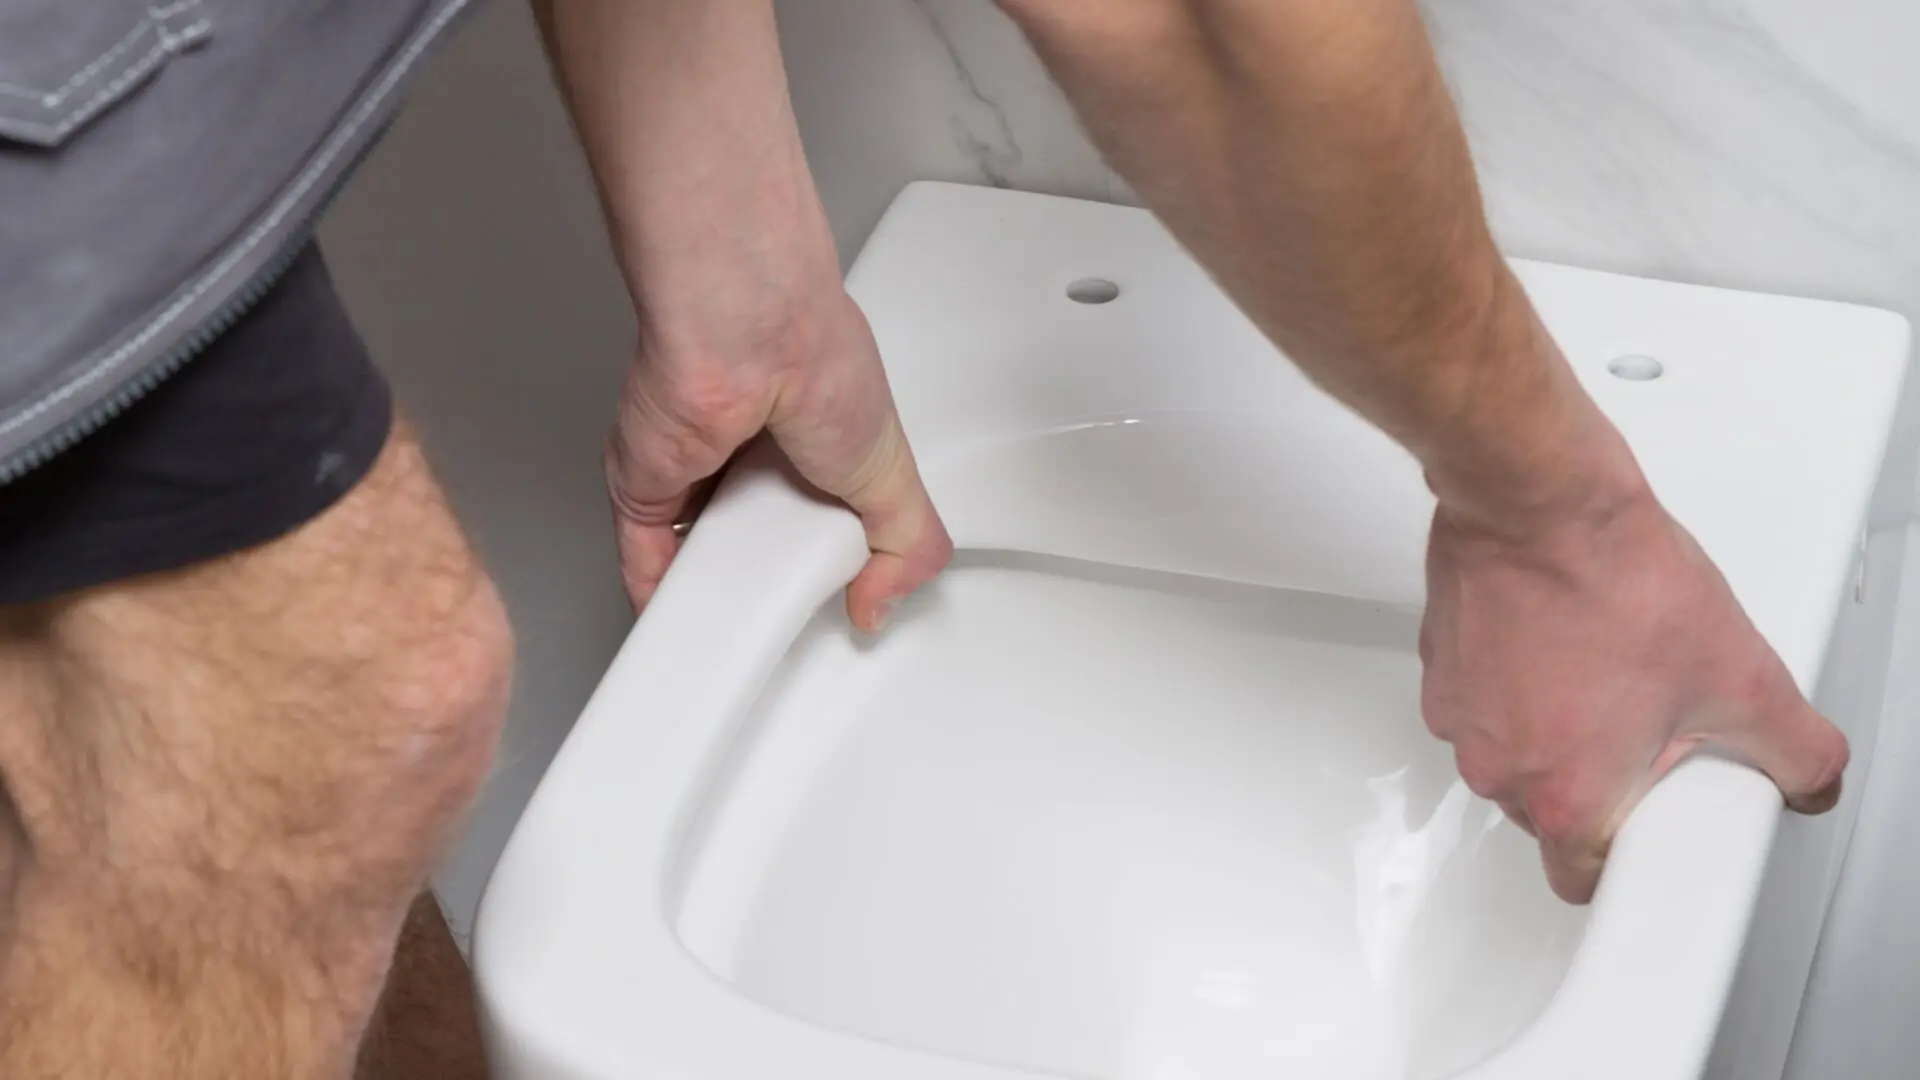
Setting the Toilet
![]()
Carefully lift the new toilet and position it over the flange. Align the closet bolts with the bolt holes on the toilet base. Lower the toilet gently onto the flange, ensuring the wax ring compresses evenly to create a watertight seal.
It is crucial to align the bolts properly to avoid damaging the wax ring. Once the toilet is in place, press down firmly to seat it securely on the finished floor. Ensure the toilet is level using a spirit level, adjusting as necessary by pressing down on different sides. This step is critical to prevent rocking and ensure a stable installation.
Securing the Toilet
![]()
With the toilet in place, secure it by tightening the bolts.
Use a wrench to tighten the plastic bolts, but be cautious not to over-tighten, as this can crack the ceramic. Place a rubber washer and a brass washer over each bolt, followed by a nut. Tighten the nuts gradually, alternating sides to ensure even pressure.
Check the toilet’s level frequently during this process. Once the toilet is secure, install the bolt covers for a finished look. Complete the installation by attaching the toilet tank and connecting the water supply. Finally, silicone caulk was applied around the base to seal the toilet and the floor.
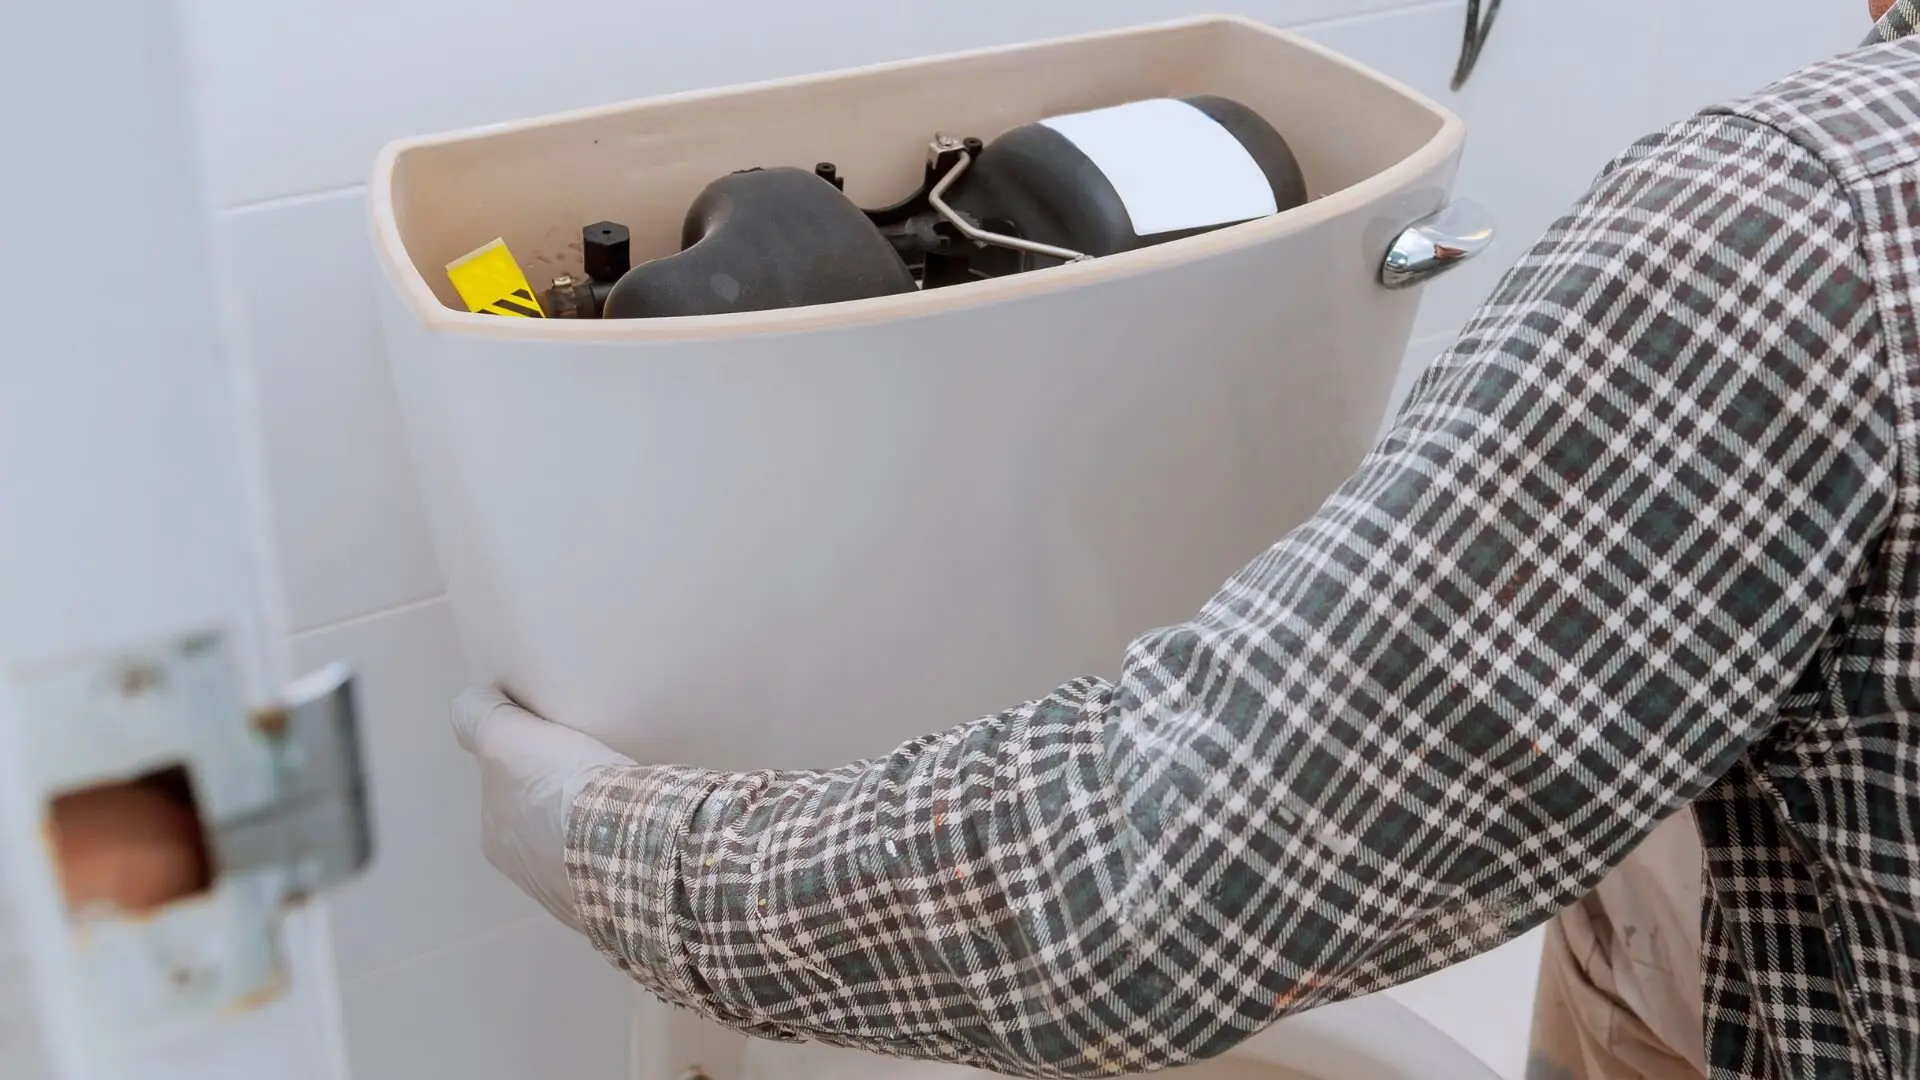
Attaching the Toilet Tank and Seat
![]()
Attach the toilet tank to the base using the provided tank bolts, ensuring a secure fit with the rubber gasket in place. Connect the water supply line to the valve shank and turn on the water supply to check for leaks.
Install the new toilet seat, ensuring it is properly aligned and secured with the plastic keepers provided. Lastly, test the flush valve and other flush valves to ensure they operate correctly. If everything is in order, your new toilet installation is complete, and your bathroom is ready for use.
Connecting the Water Supply
To reconnect the water supply line to your new toilet, start by attaching the water supply line to the water tank. Ensure the connection is tight but not overly tightened to avoid damaging the threads. Use an adjustable wrench if necessary to secure the connection.
Next, turn on the water supply slowly to allow the tank to fill. As the water tank fills slowly, check for any leaks around the connection points, including the tank bolt and spud washer. If you notice any leaks, turn off the water supply and tighten the connections further.
Older toilets might have different fill valve adjustments compared to new toilets. Adjust the fill valve if necessary to ensure the water level is correct. The water level should be just below the overflow tube inside the tank.
Once the tank is filled, flush the toilet to check the operation of the new bowl and toilet wax ring. Ensure the floor ring and new wax ring are sealing properly without any leaks. For a clean finish, apply tile caulk around the base of the toilet and floor. Be sure to also install the new toilet seat, securing it firmly.
Finally, check the entire installation, including the floor ring and tile caulk, to ensure everything is secure and leak-free.
Final Touches and Testing
Install the toilet seat and lid by aligning them with the holes in the toilet bowl and securing them with the plastic bolts provided. Once the seat is firmly in place, test the toilet by flushing it several times. Observe closely for any leaks around the base of the toilet.
If you notice any leaks, tighten the bolts slightly, ensuring that you do not over-tighten and crack the ceramic. Then, apply tile caulk around the base of the toilet to seal it to the finished floor, ensuring a clean and professional look.
Troubleshooting Common Issues
Toilet Rocking
If the toilet is wobbly, check if the floor is uneven. Use plastic shims under the toilet base to stabilise it. Tighten the closet bolts gradually, but avoid over-tightening to prevent cracking the porcelain.
Leaks
Leaks can occur from a poorly seated wax ring or loose bolts. Ensure the toilet wax ring is correctly positioned and that all bolts (including tank bolts) are securely tightened. Apply tile caulk around the base for added seal.
Weak Flush
A weak flush may be due to a low water level in the tank. Adjust the fill valve to raise the water level to the appropriate height. Ensure the flush valve and spud washer are functioning correctly.
Ready for a Professional Touch? Contact WP Plumbing Today!
With the right tools and know-how, you can successfully tackle a DIY toilet installation. This project offers the satisfaction of a job well done and the potential for cost savings. However, unforeseen complications can arise, leading to leaks or frustration.
For a guaranteed, professional toilet replacement, consider contacting WP Plumbing. Our licensed plumbers have the experience and expertise to ensure a seamless installation, saving you time and hassle in the long run. Call WP Plumbing today or visit our website for a free consultation!